Create + Manage Financial Aid Requests Step by Step Guide
As a student, you can create requests in Workday to initiate changes related to your financial aid.
Request Types
The requests below can all be initiated the same way, but they have unique forms and requirements for completion.
|
Type of Request |
Purpose of Request |
|---|---|
|
Financial Aid Petition |
Appeal for additional financial aid due to financial hardships. |
|
Satisfactory Academic Progress (SAP) Appeal |
Appeal the financial aid SAP status decision in order to regain your financial aid eligibility. |
|
Cost of Attendance Petition |
Appeal for an increase in your Cost of Attendance for additional expenses. |
|
Change of Loan Acceptance Decision |
Request for accepting previously declined loans. |
|
Request Loans of Different Amounts per Semester |
Accept award amounts (loans) that vary by academic period (term). |
|
Cal Grant B Disbursement Option Request |
Request for receiving the Cal Grant B Stipend as refund |
Please make sure to submit a correct request in order for our office to identify and process your request properly without any delay. Thank you.
- Create a Request in Workday -
1. Log in to Workday.
a. Go to workday.cca.edu, and log in using your CCA Account credentials.
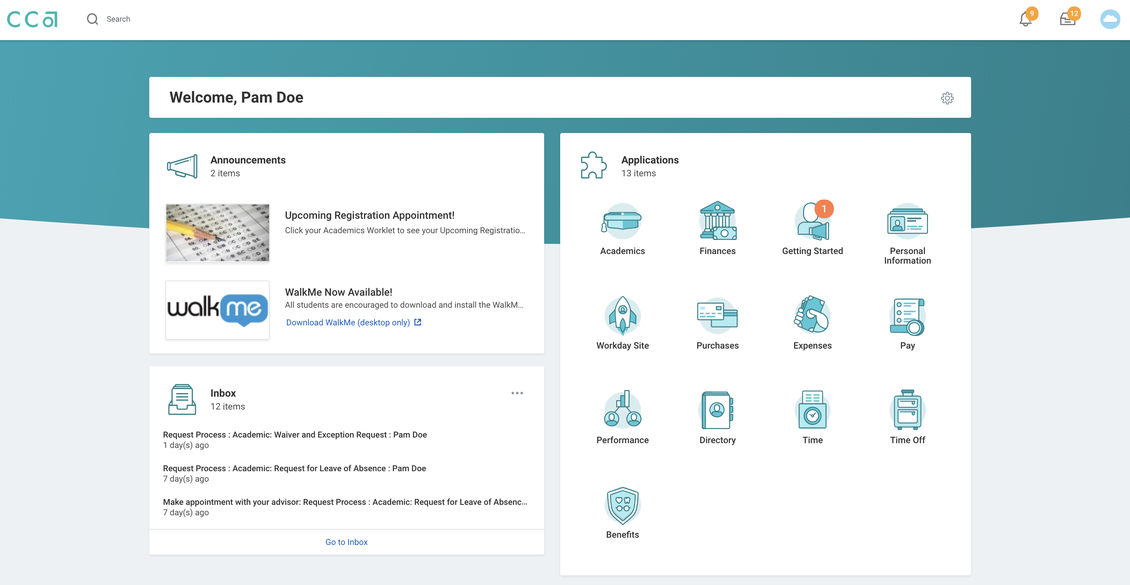
2. Create Your Request
a. Enter Create Request in Workday’s search bar and click task that pops up.

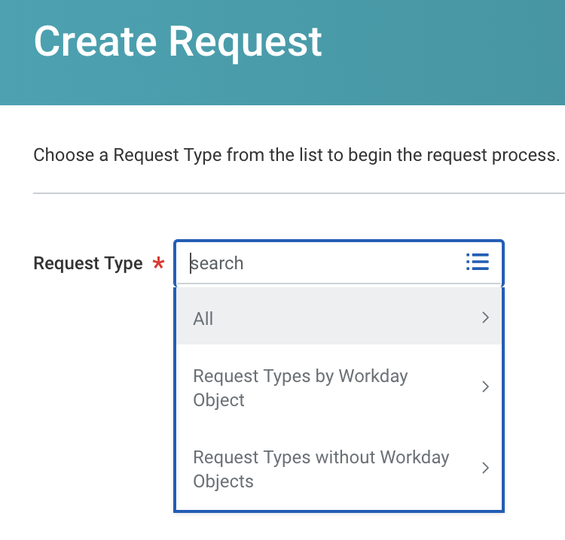
b. Select Request Type using the dropdown menu or by entering search terms (see list of request types above).
- Select the All filter in the dropdown menu in order to see the available request types.
- This guide is geared towards financial aid requests, but other types of requests may be added in the future and accessed using the Create Request task.
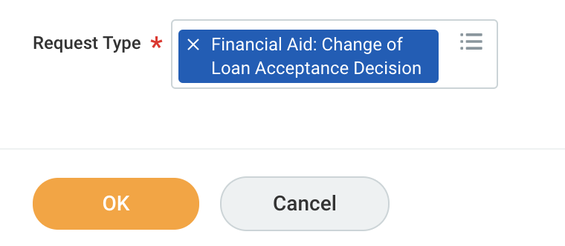
c. After selecting the Request Type, click OK to proceed.
Please note: the screenshot is only an example. Please make sure to type the correct name of the request you would like to complete.
3. Complete Request Form
a. Enter required information for your request as outlined in the form (fields will differ by request type).
- All requests contain a required Describe the Request field, where students are expected to provide a very brief explanation of the reason for the request.

b. When you have finished filling out the form, click one of the following at the bottom of the screen:
- Submit sends your request to the appropriate CCA staff for approval.
- Save for Later will retain a copy of your request form without sending it out for approval.
- See step 4 for more information on managing draft and submitted requests.
- Cancel will discard your request form.

- Manage Requests -
4. View Your Requests
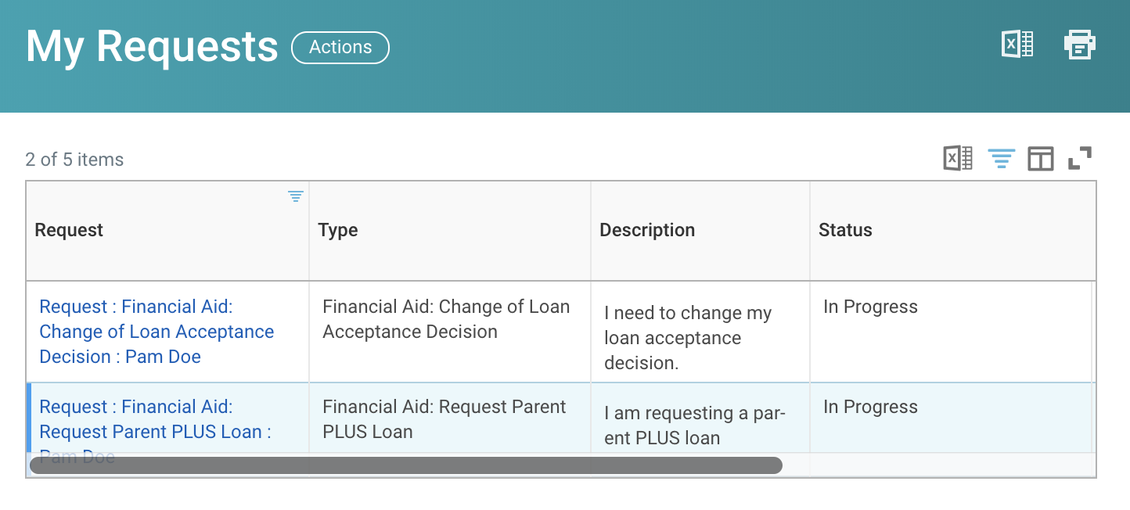
a. Enter My Requests in the Workday search bar and click the task that appears.

b. Review your request details in the My Requests table:
- Request Type (see list above for available types).
- Description, or what you typed in to the Describe the Request field (see step 3a above).
- Status, or whether the request is in progress or resolved.
- Resolution details, specifying if a resolved request was completed successfully or canceled.
- Relevant dates, including request Initiation Date and Completion Date.
5. Revise a Draft Request

a. From the My Requests table (see step 4 above if you need help getting there), find the request you have not yet completed.
b. Hover over the request name in the Request column.
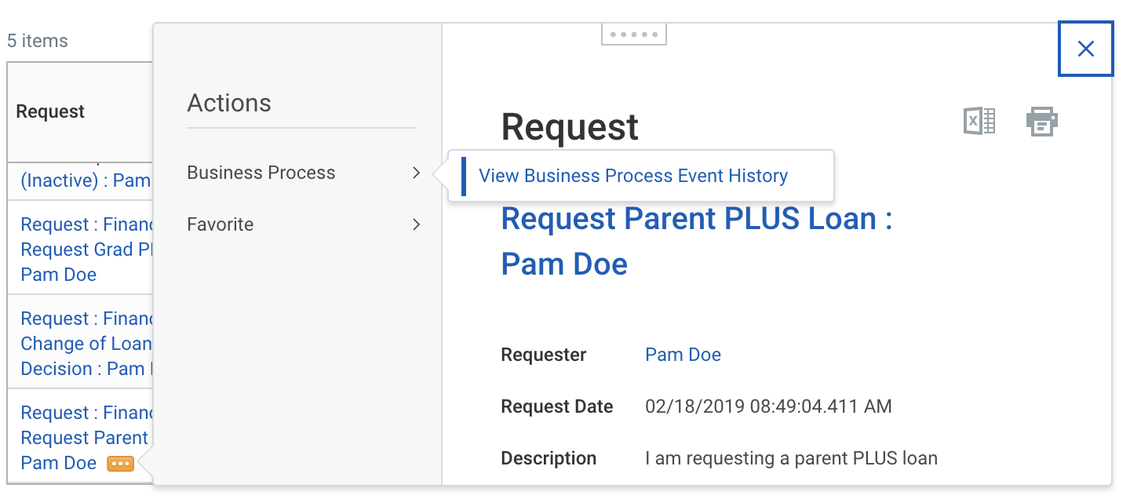
c. Click the Related Actions button, which appears as three dots bounded by a rectangle to the right of the request link.
d. In the popup menu that appears, click Business Process.
e. Click Business Process Event History (a fancy way of referring to your request's details and status).
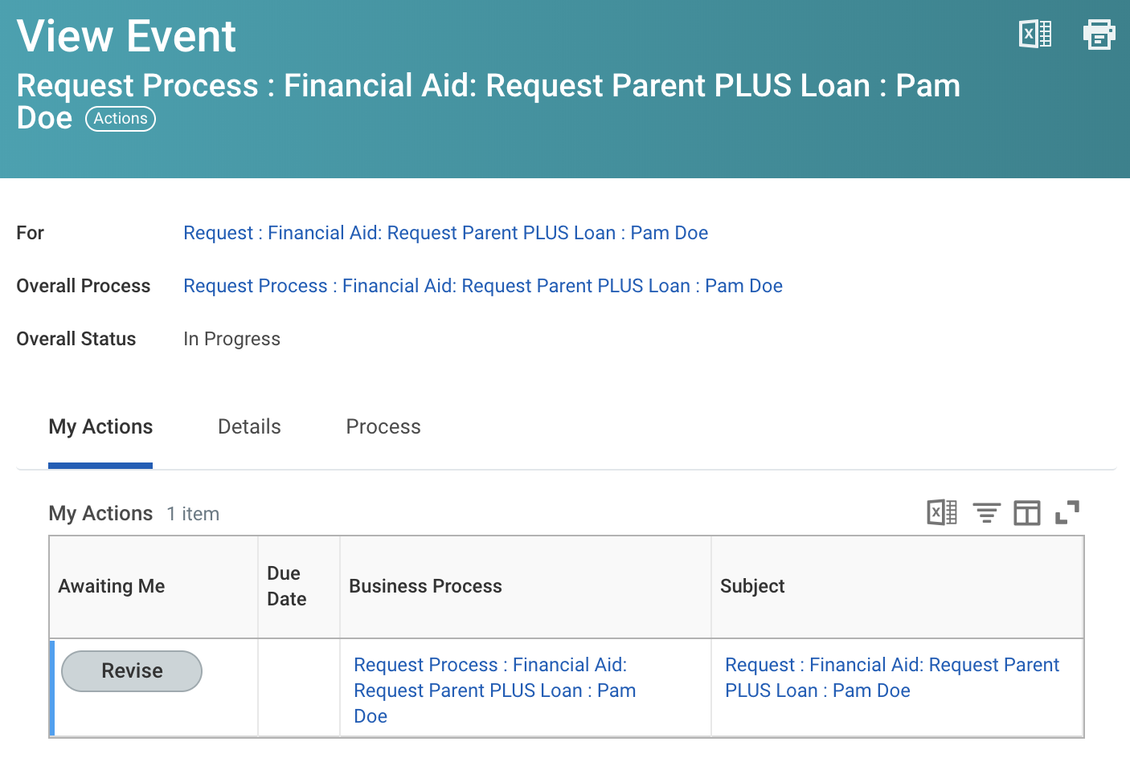
f. If you have chosen a draft request, you will see a My Actions tab in the resulting screen.
- All requests, regardless of status, show Details and Process screens.
g. Click the Revise button under the Awaiting Me table column.
h. Refer to step 3 above to complete the request form.
Protips
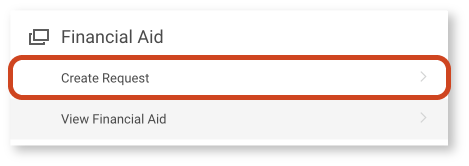
#1: You can also initiate requests from the My Student Finances dashboard. From the Workday home dashboard, click My Student Finances from the applications menu. Under the Financial Aid section of the task/report menu, click Create Request.
