Make a Payment on Account (Step by Step Guide for Students Not Enrolled in a Touchnet Payment Plan)
Please note that only financial aid with an “accepted” status on Workday will be automatically deducted from student’s total term charges. Students can accept or decline financial aid by following the steps here (Step 10).
View your Bill
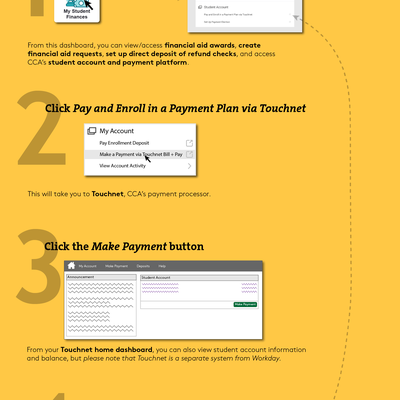
- Go to workday.cca.edu, and log in using your CCA Account credentials.
- Under Applications, click the My Student Finances icon.

The resulting screen is your Student Finances Dashboard, from which you can view:
- Financial Aid Action Items, or steps you need to complete in order to receive financial aid awards.
- A menu of major tasks/reports related to both financial aid and payments on your account.
- See the Sign Up for Direct Deposit of Refund Checks: Step by Step Guide for help setting up Payment Elections for student account refunds.
- See the View Financial Aid (Accept/Decline Awards) Step by Step Guide for further guidance on financial aid tasks.
- Pay and Enroll in a Payment Plan via Touchnet - Click this link to view your bill and make a payment to be directed to Touchnet, our payment processor.
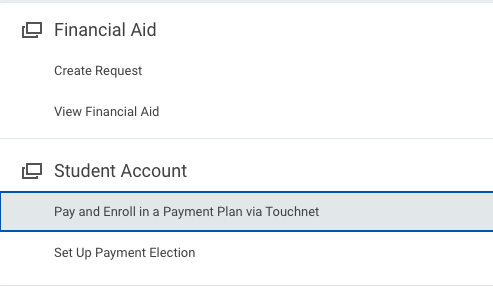
The initial screen shows pertinent announcements and account balance information. Review this information as needed.
a. Click the "View Activity" button to view your bill then click the Term to see the details.
- Balance is your total unpaid balance for the current term and any balance from other terms.
- Estimated Financial Aid is your total aid for the current term and other terms that is set to disburse to your student account once your meet the disbursement requirements.
- Balance including Estimated Aid is the Balance minus Estimated Financial Aid
The per term balances can be seen on the right side of the page.
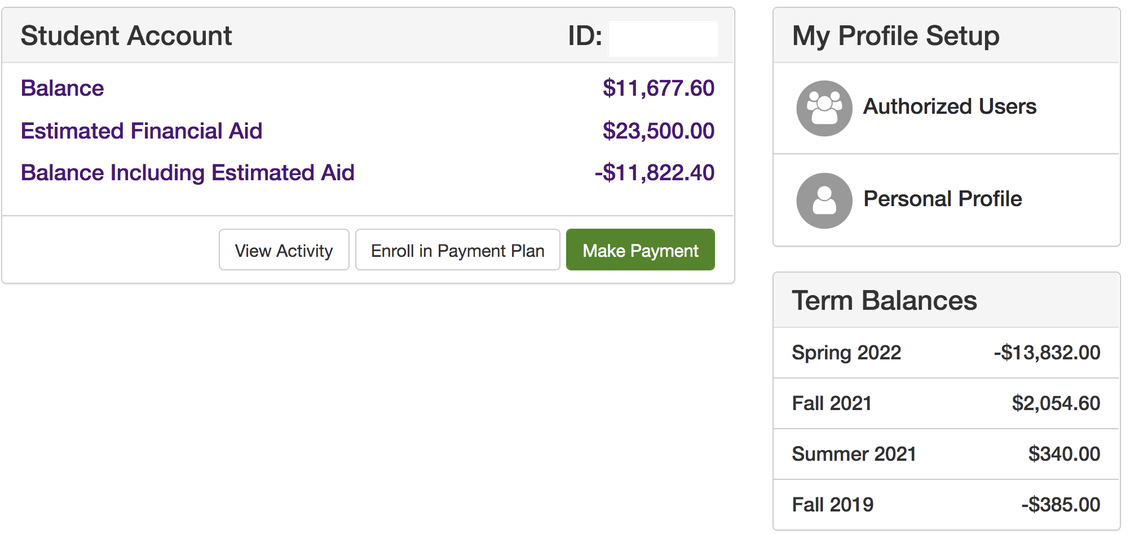
b. The Filter activity by is set to Full account activity by default.
- Alternatively, you can click the drop down and filter by date. Enter the date range you'd like to view.

c. You can click on each term to expand or click the Expand All button at the top right. You can print your account activity or export it to Excel and PDF.
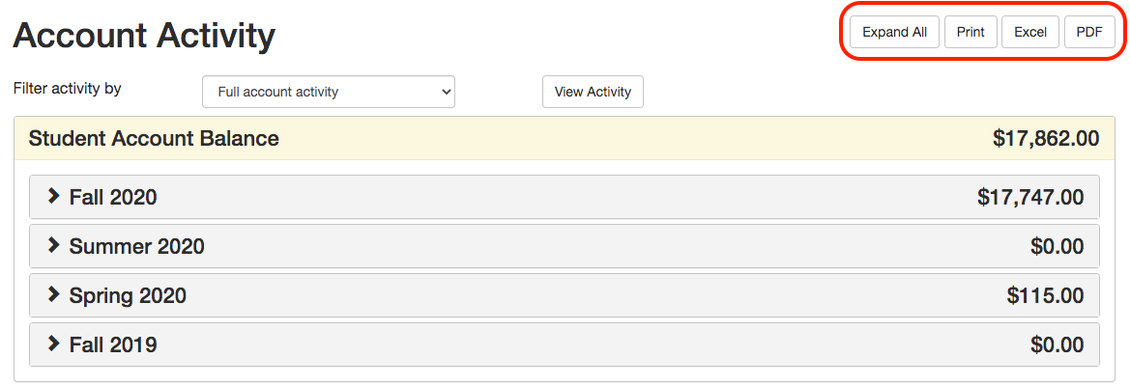
d. Once you have expanded a term or all terms, this screen reflects the estimated financial aid (if applicable) and the breakdown of charges, payments and refunds.
e. You can print your account activity per term or export it to Excel and PDF.
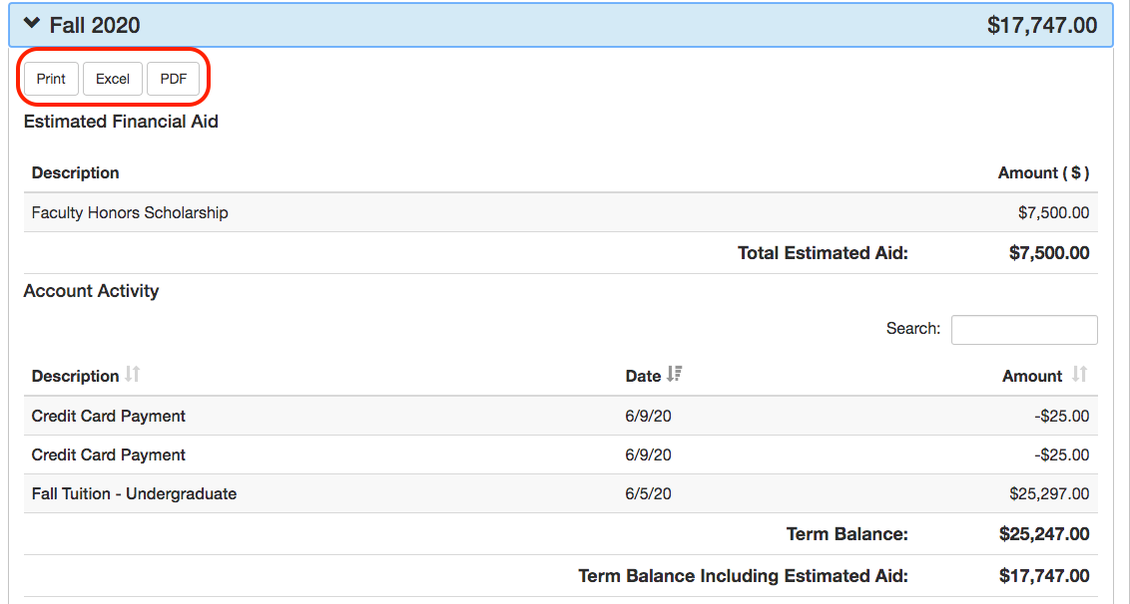
f. You have the option to search for different types of transactions (e.g.payment, tuition, etc.). Enter the word or combination of words in the Search box.

Make a payment on the Touchnet payment site
a. Navigate back to the home screen.

c. The initial screen shows pertinent announcements and account balance information. Review this information as needed.
d. Click the Make Payment button to initiate a payment.

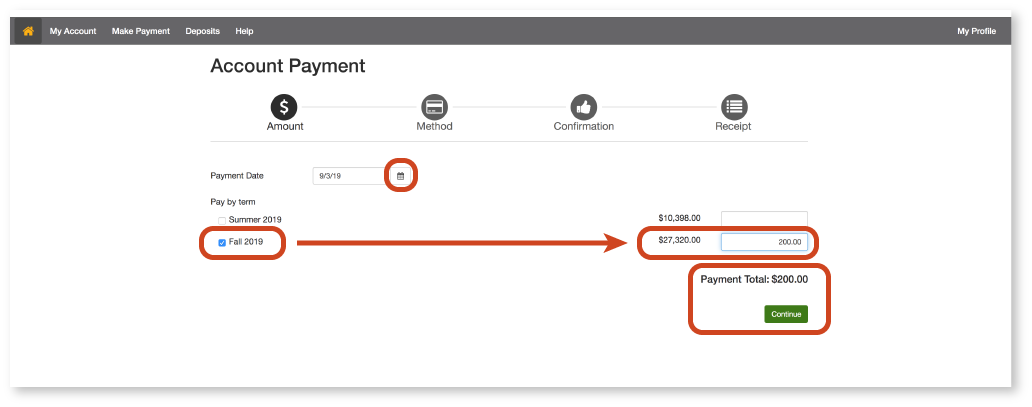
- Set the Payment Date for when you want the transaction to go through.
- This field defaults to the current day, but you may select a future date—with no limit—for the payment to process.
- This only controls a single payment and should not be mistaken for an auto-pay feature. Students enrolled in a payment plan must schedule their future installment payments by following the instructions listed on the Enroll in a Payment Plan step by step guide.
- Under Pay by term, check the box(es) for the term(s) you would like to submit a payment for.
- In the corresponding box(es) on the right, enter the amount (in US dollars) you want to pay.
- Total balance for the corresponding term will display to the left of the amount box.
- Review and click Continue to proceed.
- The Payment Total is the sum entered for all terms on this screen.
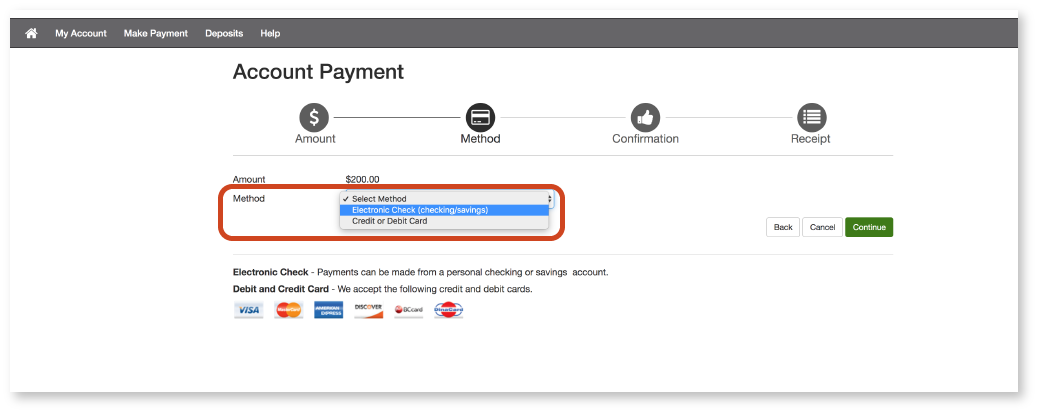
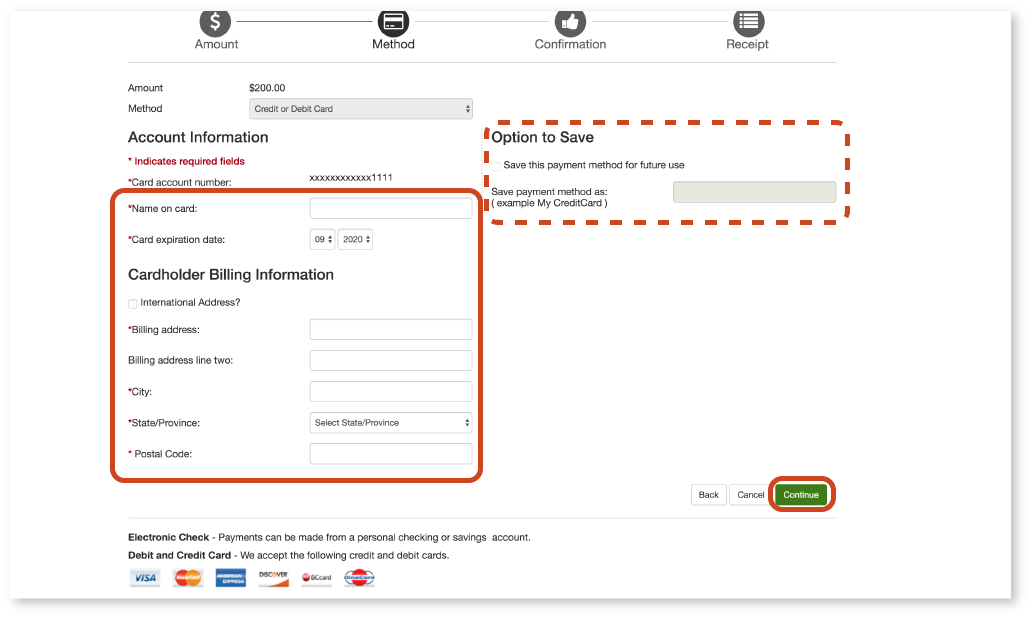
f. Specify a payment method from the Method dropdown.
- Accepted payment types include credit, debit, or electronic check.
g. After specifying a payment method, enter required Account Information, such as the card or checking account number.
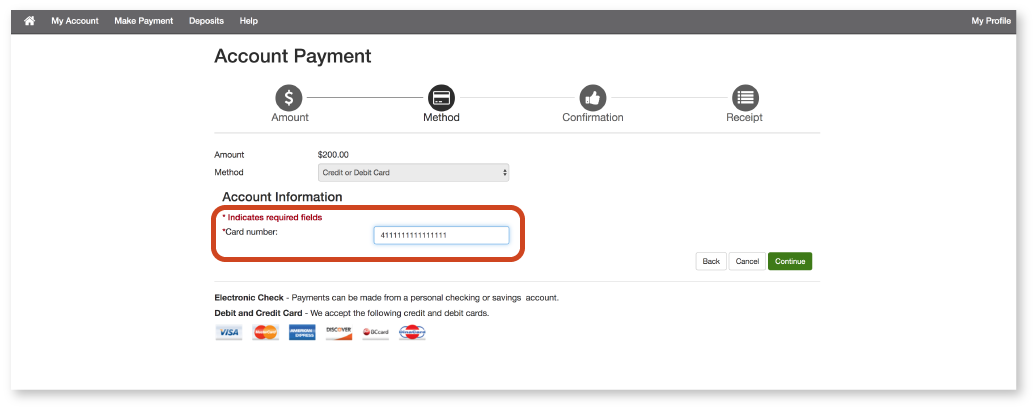
h. Next, fill in any additional information required.
- If you are making a payment by credit or debit card, this will include Name on card, Card expiration date, and billing information.
- Check the box under the Option to Save heading to retain the account information entered for future payments.
- You'll need to designate a name for the payment method in the text box provided.
- Click Continue to proceed to the payment Confirmation screen.
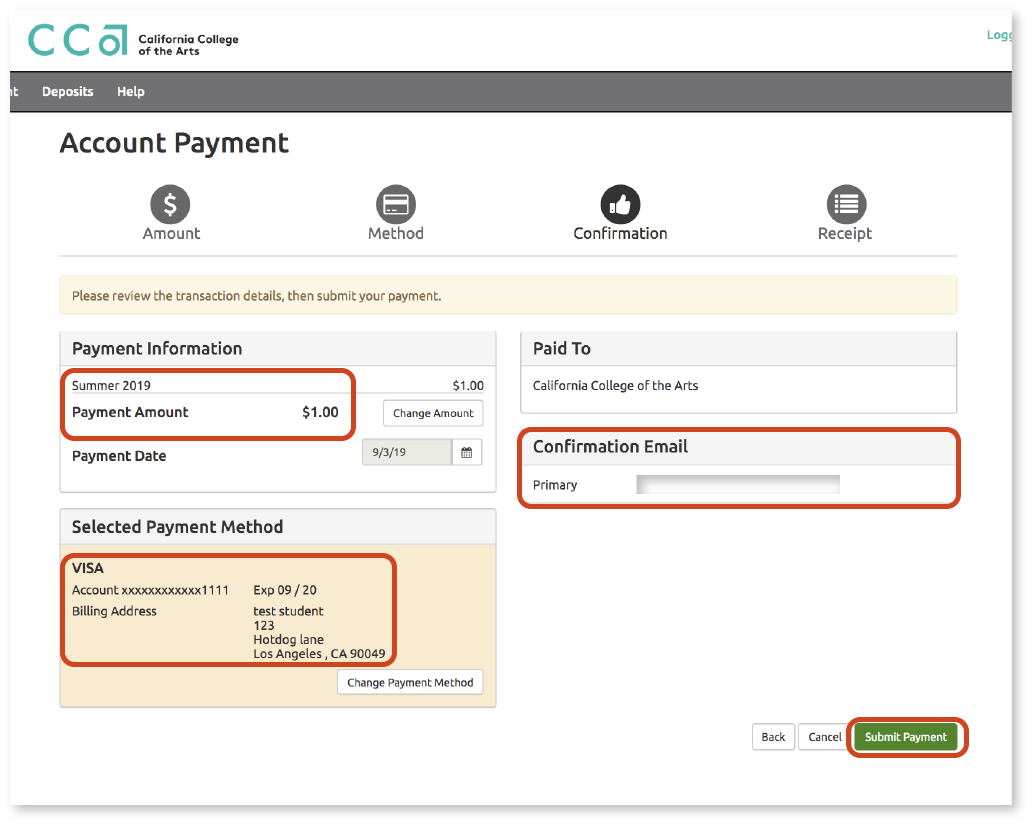
i. Confirm payment details and process payment.
- To receive an email receipt, enter your email address in the Confirmation Email text box.
- Click the Submit Payment button to complete the transaction.
j. The next screen will confirm a successful payment. Click the Print button to obtain a paper copy of this receipt.
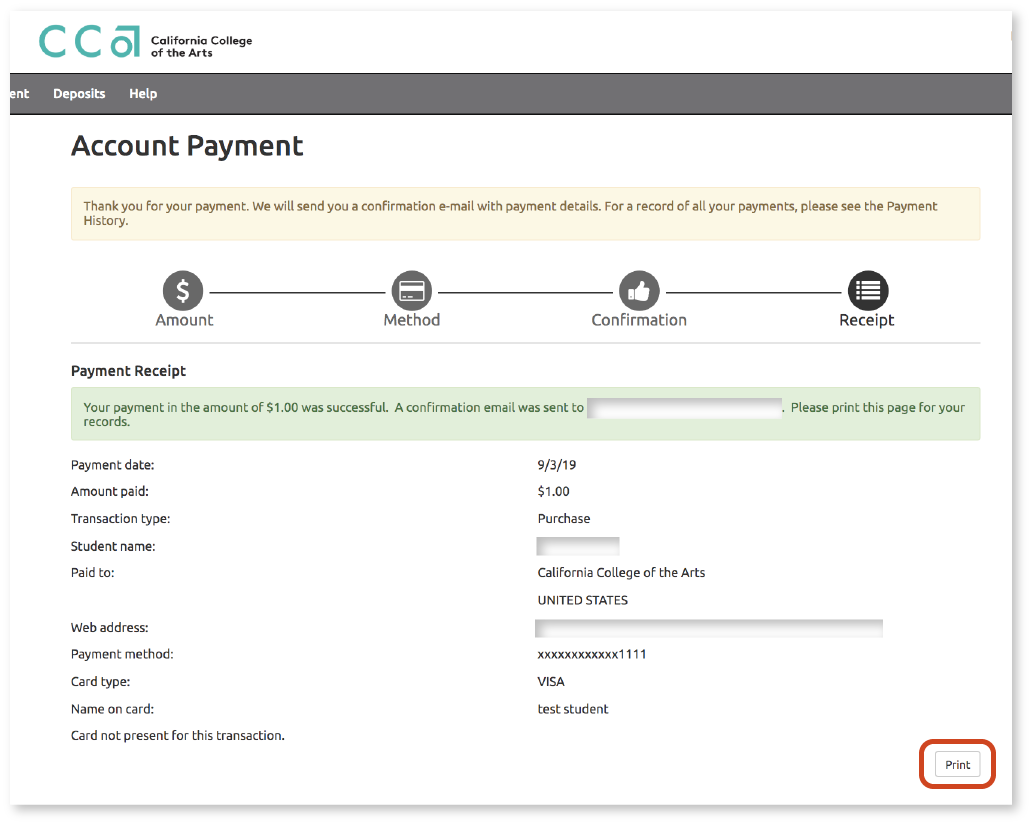
k. Check your account in Workday to view updated balances/transaction history.

