My Teaching Schedule + Roster Step by Step Guide
New: Registered students' home email (if available) now appears in Workday roster reports.
1. Access the Workday Teaching Dashboard
a. Go to workday.cca.edu, and log in using your CCA Account credentials.
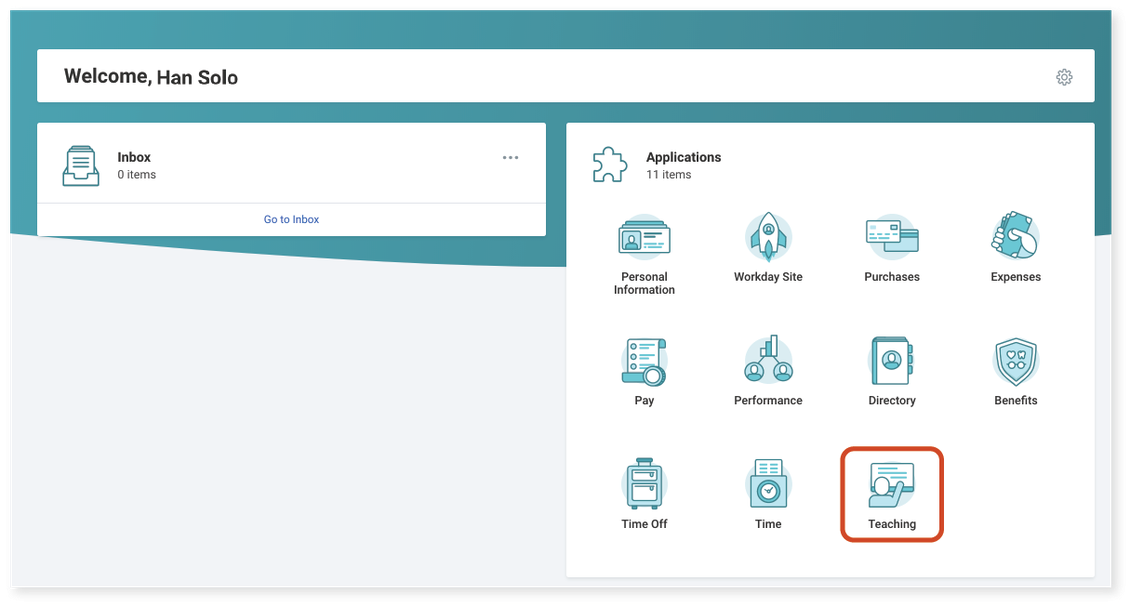
b. Under Applications, click Teaching to access your Teaching Dashboard.
2. Quick View of Your Teaching Schedule
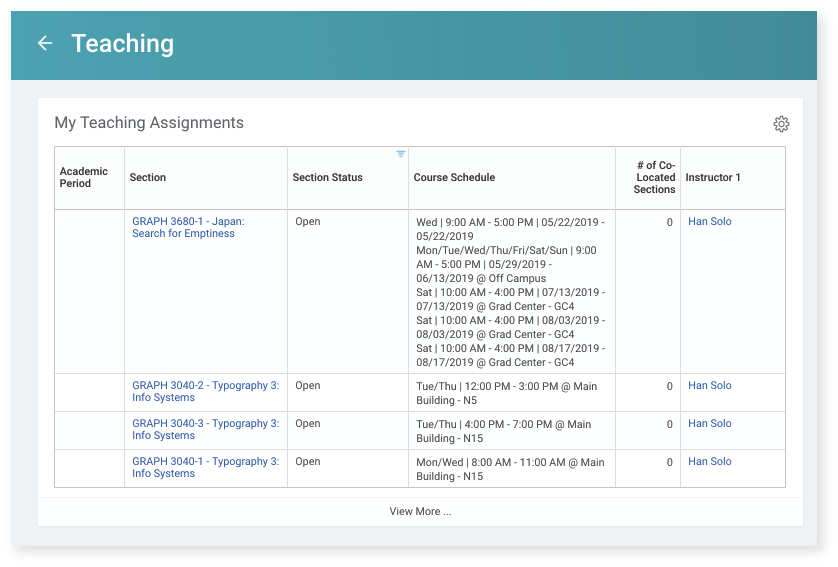
a. Refer to the My Teaching Assignments worklet on your Teaching Dashboard to view a basic schedule of the course sections you are assigned to teach, organized by academic period.
b. See the Protip below to learn how to access roster information from this worklet.
3. View Your Detailed Teaching Schedule
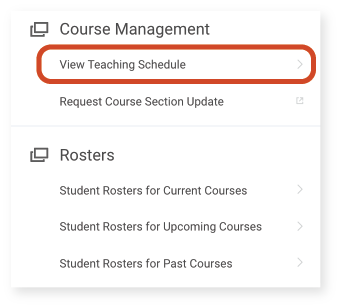
a. Find the Course Management tile, and click View Teaching Schedule.
b. From the Academic Period dropdown, select the relevant term.
- First, filter by Past, Current, Future, or Non-Year, then filter by Academic Year.
- Alternatively, type to search for a term, such as "Summer 2020."
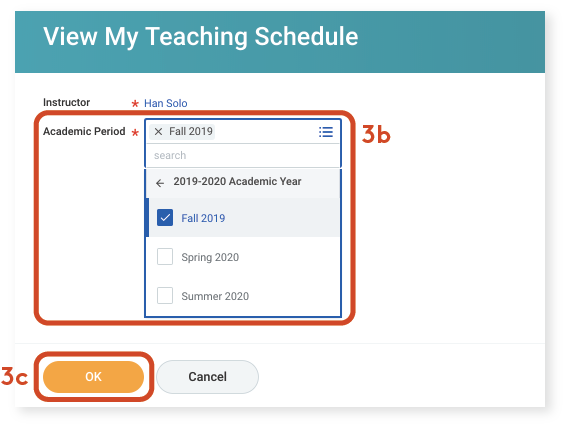
c. Click OK to proceed.
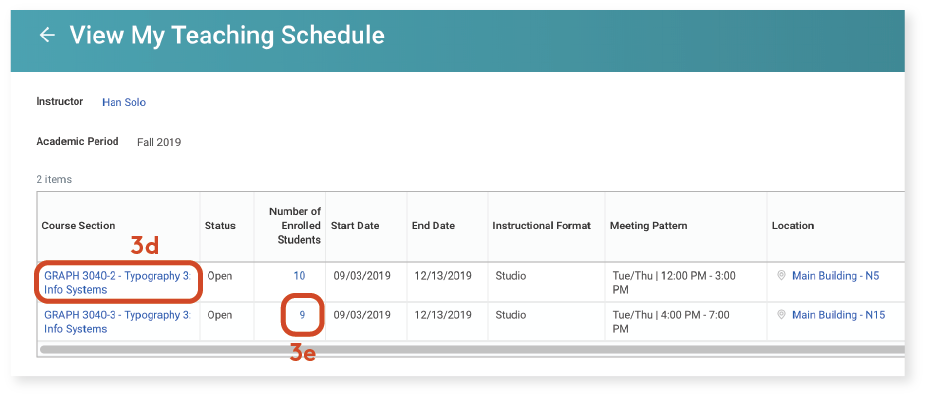
d. View course section details, like materials, section description, and section title, by clicking on a Course Section link.
- See Submit Course Section Requests: Section Title, Description, + Textbooks for instructions on how to request updates to this information.
e. See a quick view of enrolled students by clicking on the number link in the Number of Enrolled Students column.
- This only works when there are students enrolled.
- This will only give you basic roster information, including student name and program(s) of study. Please see step 4 below for how to access additional roster info.
4. Access Your Course Section Roster
**This is just one method of accessing your class roster information.**
- See the Protip below for an alternative method using Related Actions on course section links
- See Printable Class Rosters for tips on accessing roster info from the My Students by Course - Current and Upcoming worklet
a. Go to the Teaching Dashboard (see step 1 if you need help getting there).
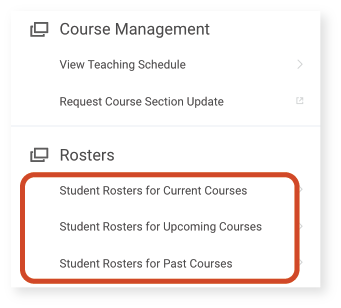
b. Find the Rosters tile, and click one of the Student Rosters for reports, depending on which term you are interested in viewing.
- Following the last meeting of a course section, that course will appear as a past course rather than a current course within these roster reports.
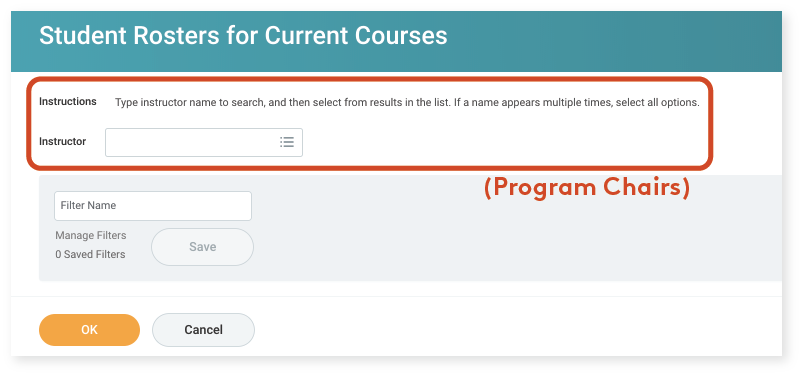
c. Unless you are a program chair, ignore the Instructor prompt, and just click OK.
- Program chairs with access to view rosters beyond their assigned courses should follow the instructions on this screen to filter their results accordingly.
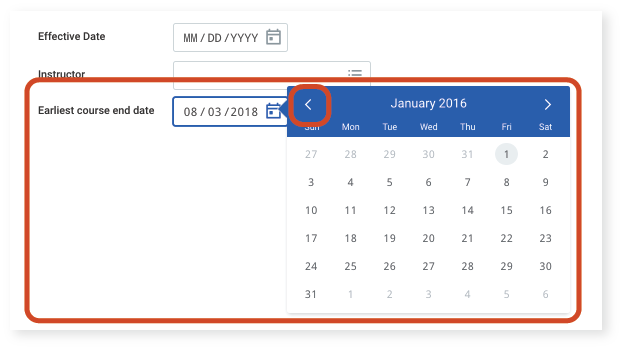
d. For the Student Rosters for Past Courses report, set the Earliest course end date to any date within the earliest academic period (or term) you would like to see.
5. View Roster Details
From your course section roster, you will immediately notice information like enrolled student's name, Email Address, Primary Program of Study, and photo (if they have one). There are a few other details here that may also be useful.
a. The Registration Status column shows whether a student:
- Is Registered in the ongoing course but has not been graded
- Has Completed (and been graded for) the course
b. Access grading functions by using Related Actions in the Section Actions column.
- Hover over the magnifying glass icon, but do not click it (click the "Twinkie" instead).
- See the Submit Grades Step by Step Guide for detailed instructions.

Protip
You can access roster information anywhere a link for your course section appears.
You can follow these instructions from the View Teaching Schedule screen (see step 3 above if you need help getting there) or from the My Teaching Assignments worklet (step 2).
a. Hover over one of the Course Section column listings but do not click it.
b. Click the Related Actions button (three dots bounded by a box, to the right of the course section, and reminiscent of a Twinkie).
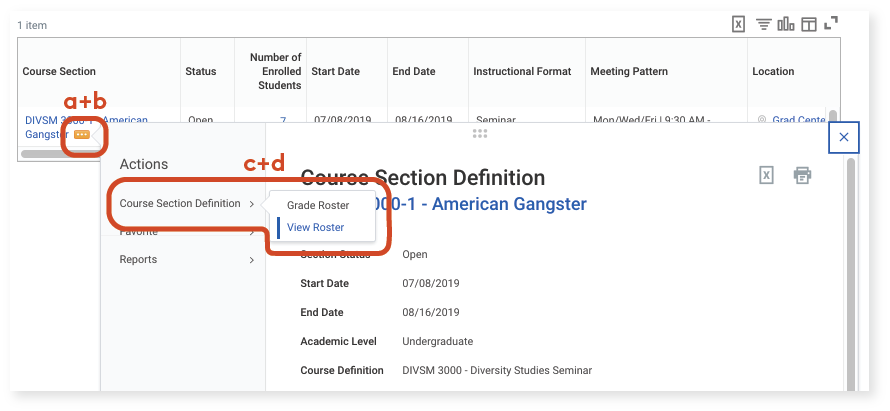
c. In the left-hand side of the resulting popup menu, hover over Course Section Definitions.
d. Click View Roster from the mini popup.
- You may also see roster grading tasks here. See the Submit Grades Step by Step Guide for detailed instruction.
e. The resulting roster table does not immediately show student photos or emails, but you can click on a student's name to view their email (or use the Related Actions menu).

- See Access Grading Tools + Student Emails Using "Related Actions" on the Workday Resources for Faculty page for instructions on how to access an easy-to-copy list of registered students' emails.
Up Next:
Learn how to submit grades in Workday, including interim (midterm) grades, final grades, and grade changes.


