Creating Assignments - Faculty
The Assignment activity provides a space where students can submit work for you to grade and provide feedback. Students can submit any digital content or files such as Word documents, PDFs, images, or audio and video clips. Alternatively, the assignment may require students to type text directly into the text editor box on the Moodle Assignment submission page.
Assignments can also be used to remind students of offline or analog assignments they need to complete, and thus do not require any uploaded content. This provides a grade item where you can still grade and provide feedback.
Jump to a section
Creating an Assignment
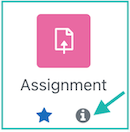
To create an assignment, first turn Edit mode on by clicking the toggle in the upper right corner of your course page. Then, go to the section where you want the assignment and click on the button that says Add an activity or resource. This brings up a window listing all of the activities or resources you can add to your Moodle course. Clicking on the "i" icon gives you more detailed information about each. Click on Assignment to move onto the Adding a new Assignment screen.

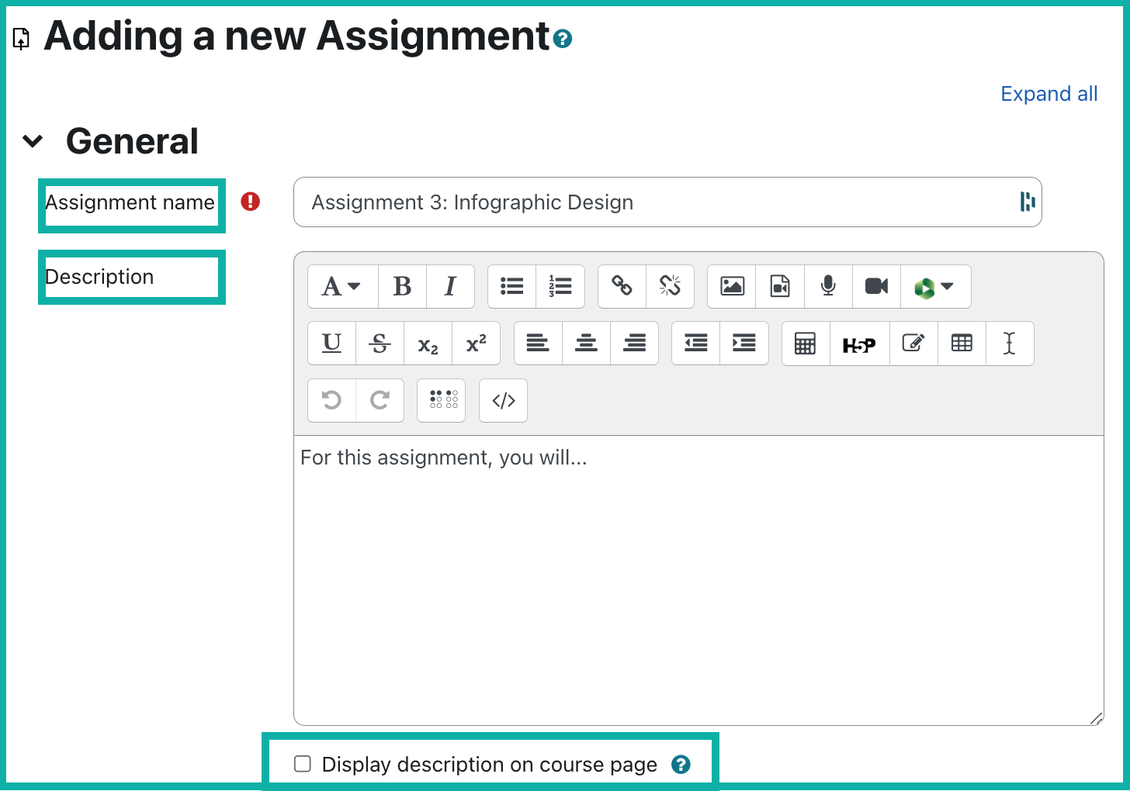
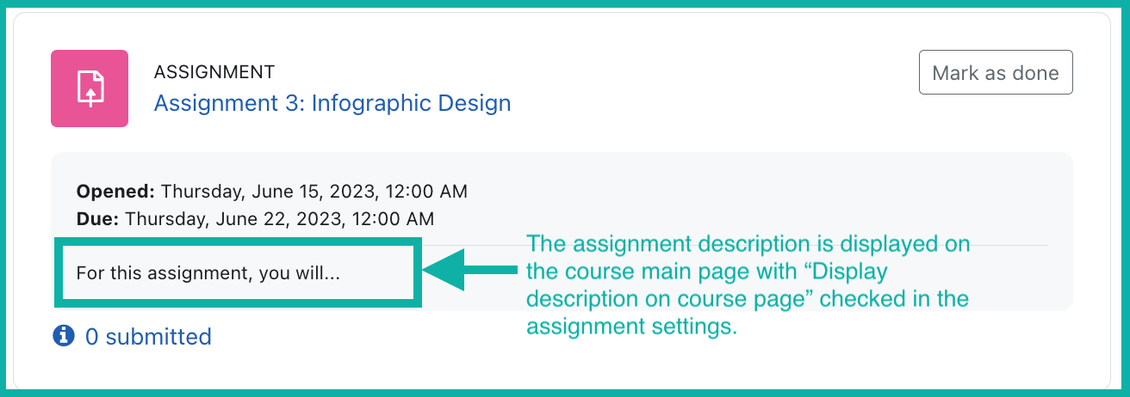
On the Adding a new assignment screen, you can give your assignment a name, a description, and if you check the Display description on course page box, your assignment description will be visible to students on the course page.
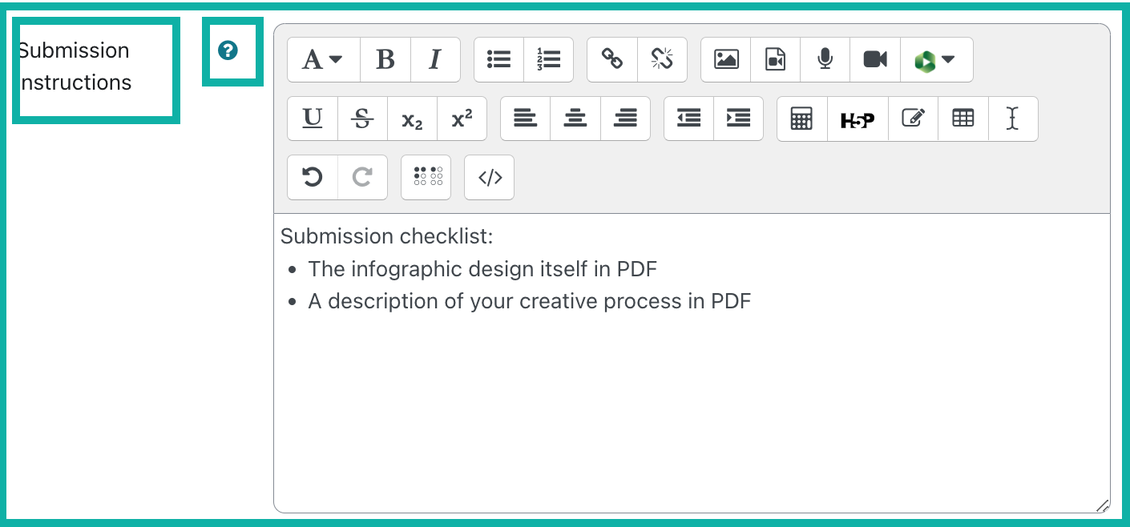
The Submission instructions will only be shown to students after they click Add submission on their end to submit the assignment. Therefore, you should use the Description box above to provide assignment instructions and only use the Submission instructions for last-minute submission checklist or reminders.
Tip: whenever there is the question mark icon in teal, you can click it to read more about what this feature or option does.
- The Additional file options give you the chance to add extra resources for students to use in their assignments.
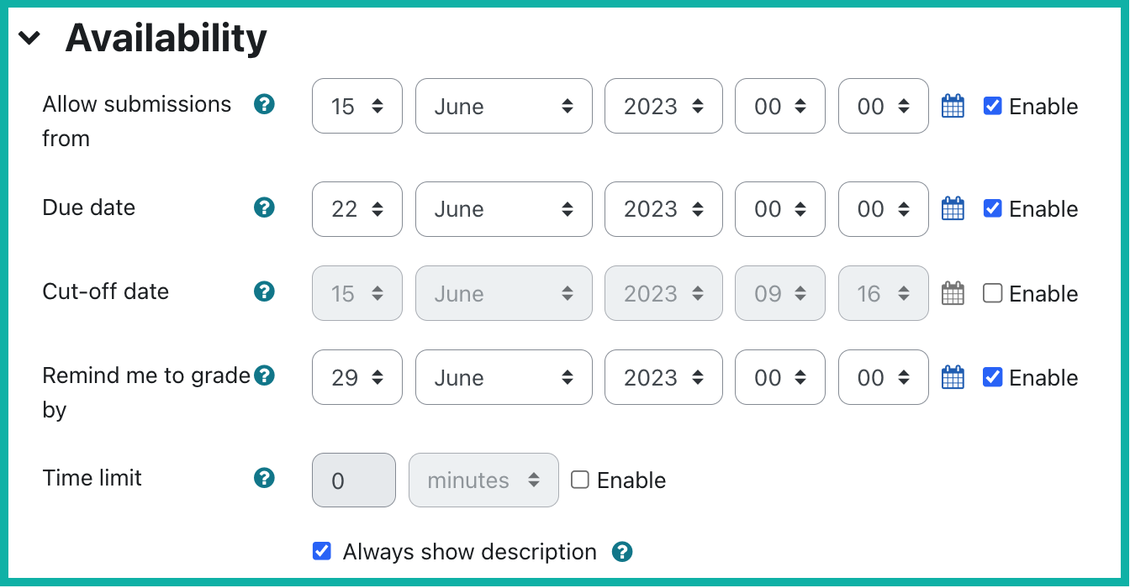
- The Availability tab allows you to add deadlines to the assignments. You can enable each, or all of them by checking the box next to them.
- Allow submissions from: This stops students from submitting before the shown date but it doesn't hide the assignment and included instructions or materials. To hide the description and instructions before this date, uncheck the Always show description at the bottom.
- Due Date: Students can still submit after this date but will be marked as late.
- Cut off Date: After this date, students will not be able to submit their assignments and the submit button will no longer be visible.
- Remind me to grade by: This reminder will only be visible to you, and Moodle will push a notification reminder to your Dashboard.
- Time limit: If enabled, a countdown timer will be displayed on the assignment page as students work on it. Students will still be able to submit after the time limit, but their submissions will be marked as submitted after the time limit for instructor's reference.
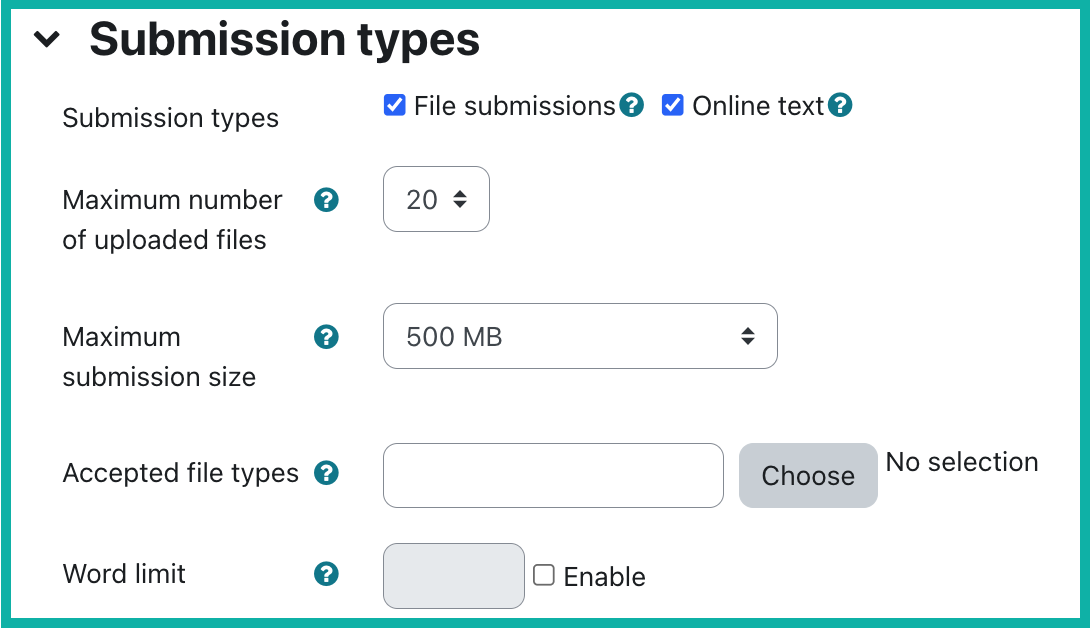
Assignment Submission Types
- File Submission: Students can upload files of any type you specify. You can also specify the maximum number of files that may be uploaded and the maximum file size for each file - up to Moodle's individual file limit of 500MB.
- Online text: Students will be provided with a rich text editor in addition to submitting files. You can set a word limit that displays a warning if students exceed it if needed.
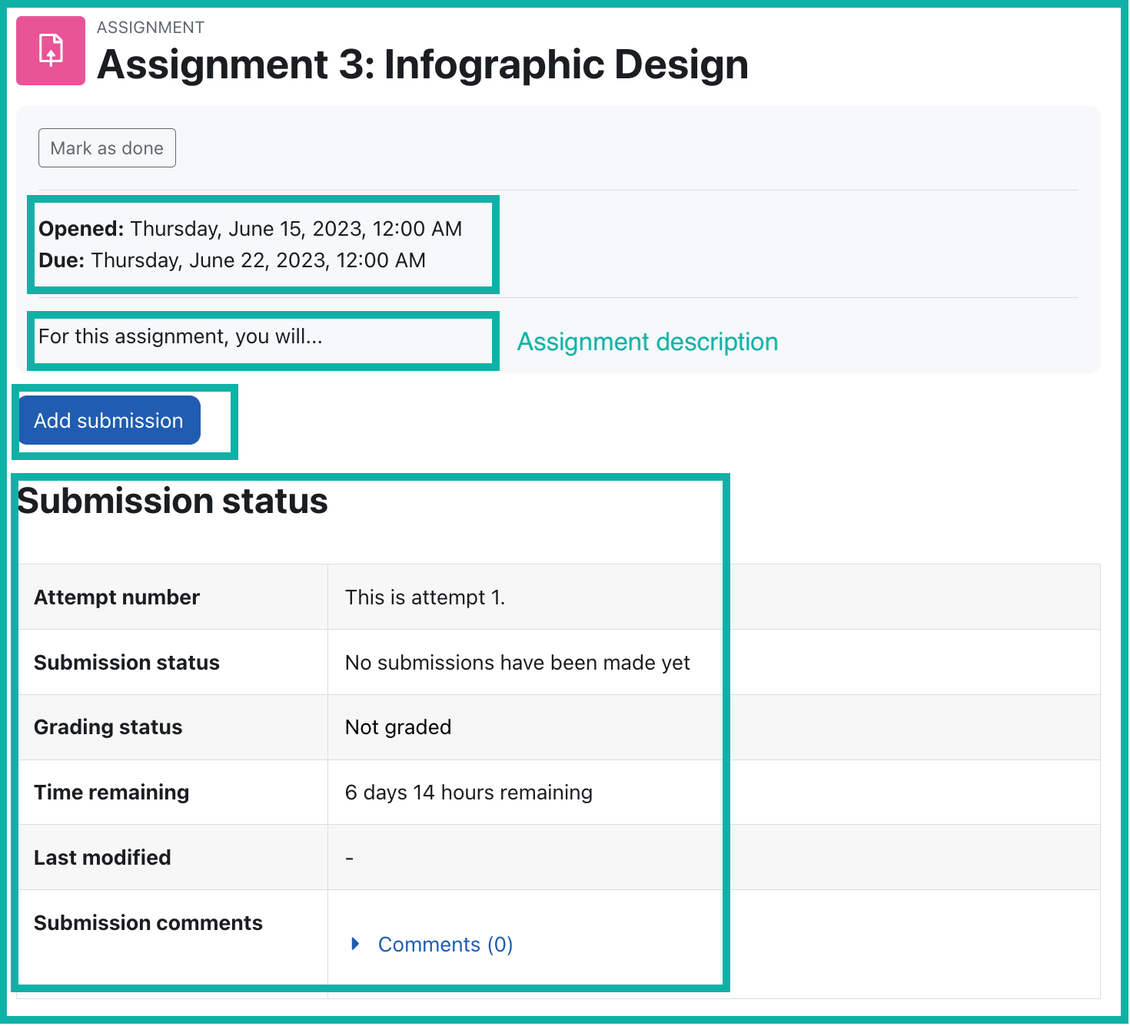
Here are some screenshots of the student view of the submission process showing where they would upload files and/or insert text or media directly online. The first screenshot shows when students click into the assignment, they see the basic assignment information you specified, such as the title, the open and due dates, and the Add submission button. The Submission status details will be updated as you grade the assignment and provide comments and feedback.
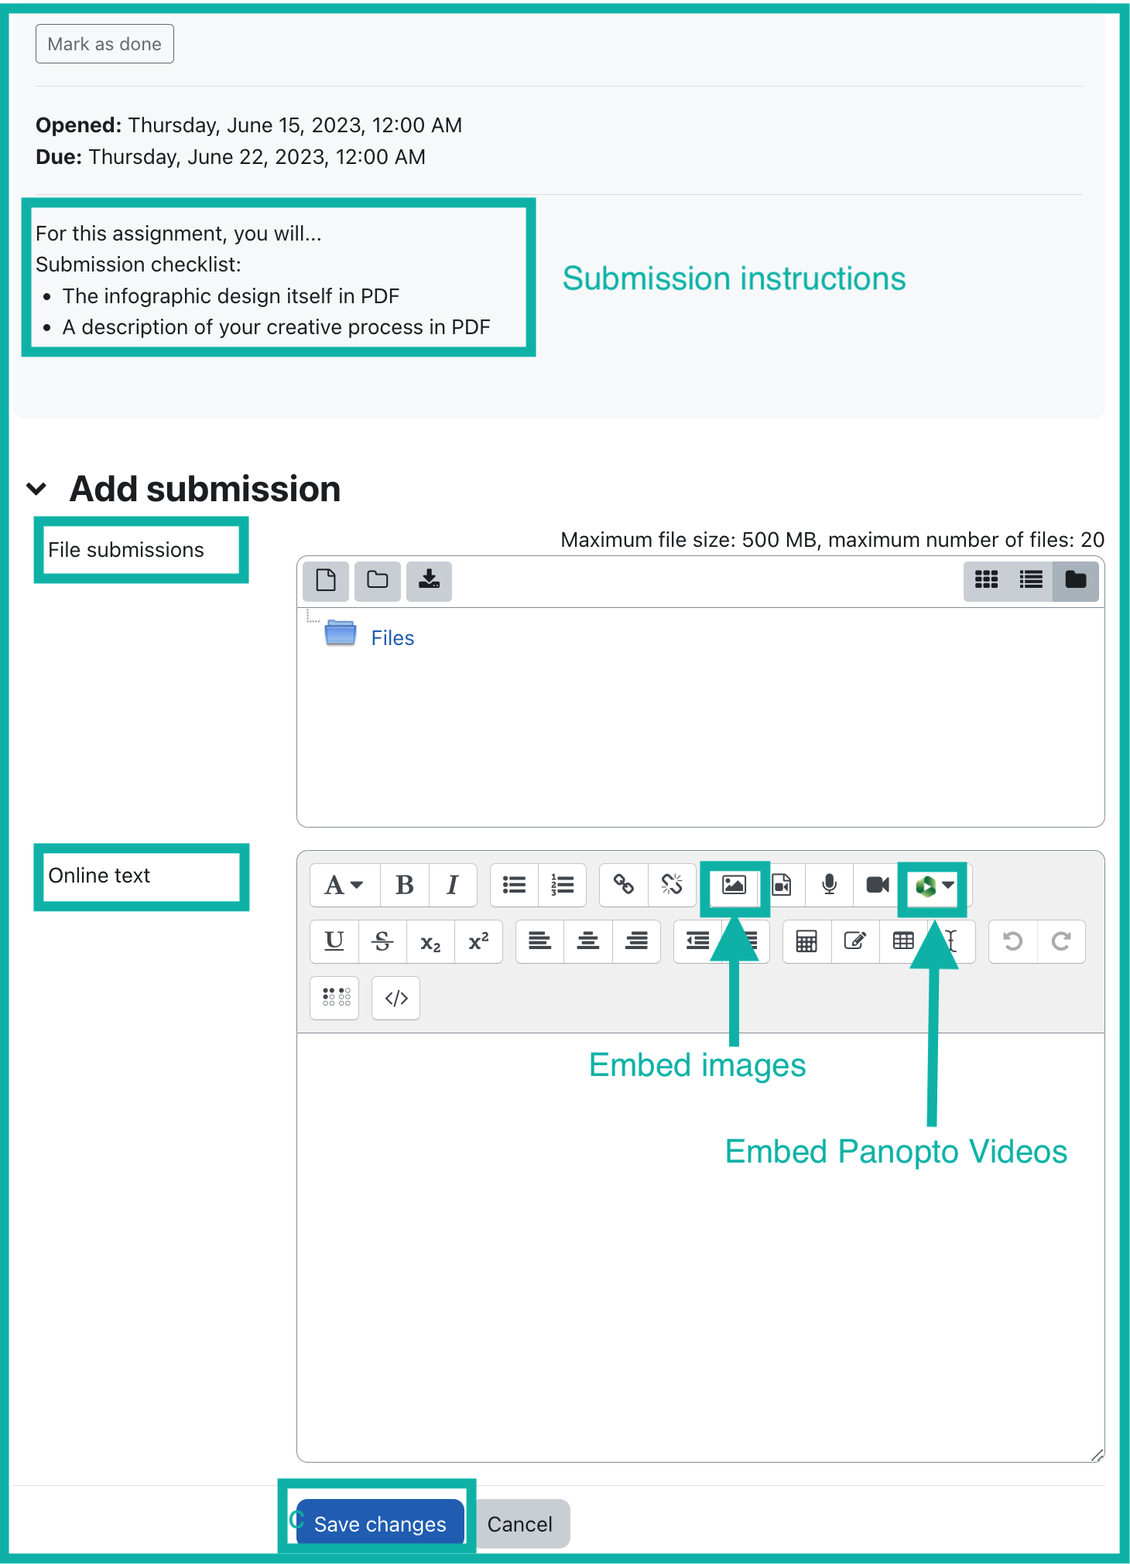
Once students click Add submission, they will be taken to the Add submission screen where they can upload files and/or use the text editor to add text and embed media as needed. The submission instructions are now shown to the students after they click Add submission. They will then click Save changes to submit the assignment.
Feedback Types
Instructors may give feedback in various ways by enabling any of the following options:
- Feedback comments: You can leave feedback comments for each submission.
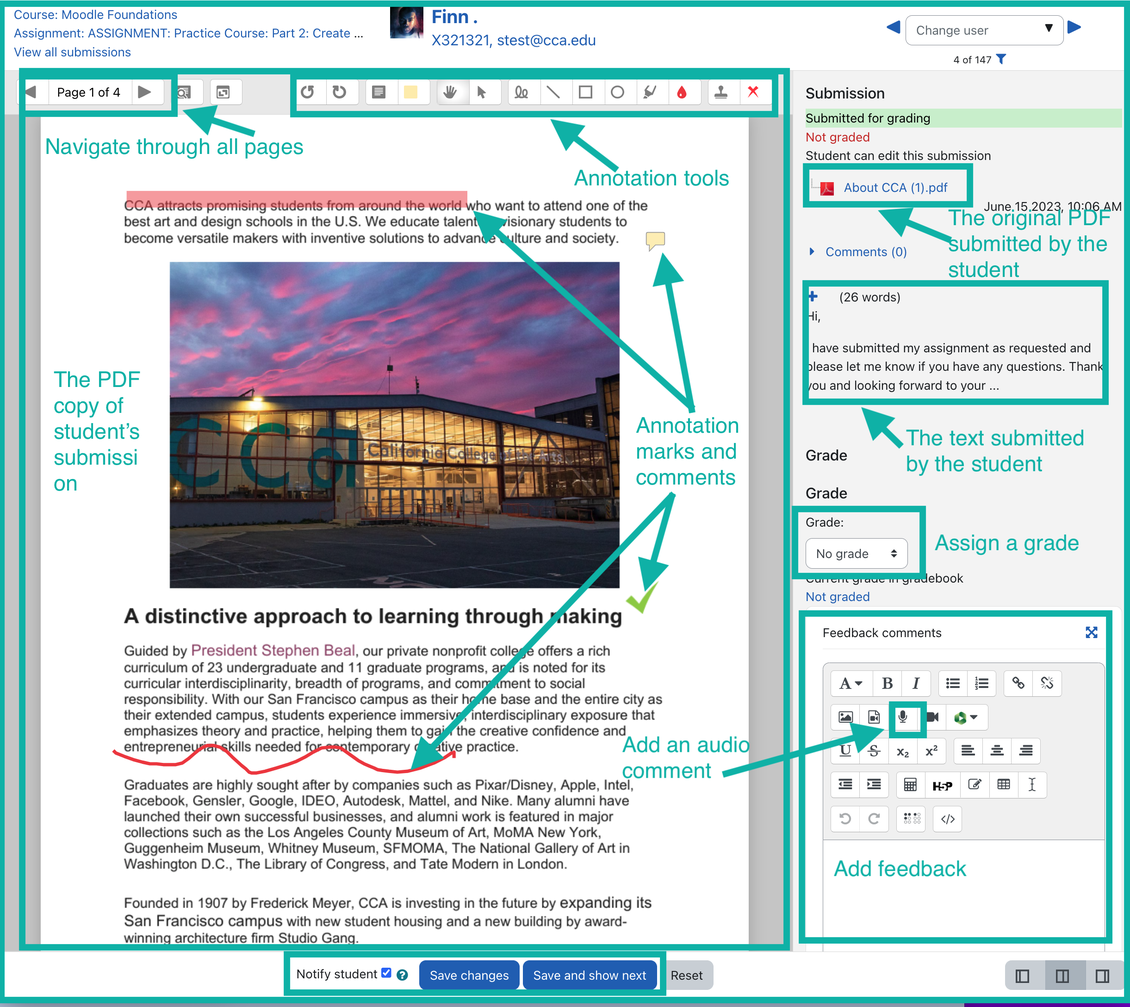
- Annotate PDF: You will be able to create annotated PDF files when grading the assignments. This allows you to add comments, drawing and stamps directly on top of the students work. The annotating is done in the browser and no extra software is required.
- Offline grading worksheet: This option is rarely needed as most instructors grade online so their grading and comments are saved simultaneously. If enabled, you will be able to download and upload a worksheet with student grades when grading assignments.
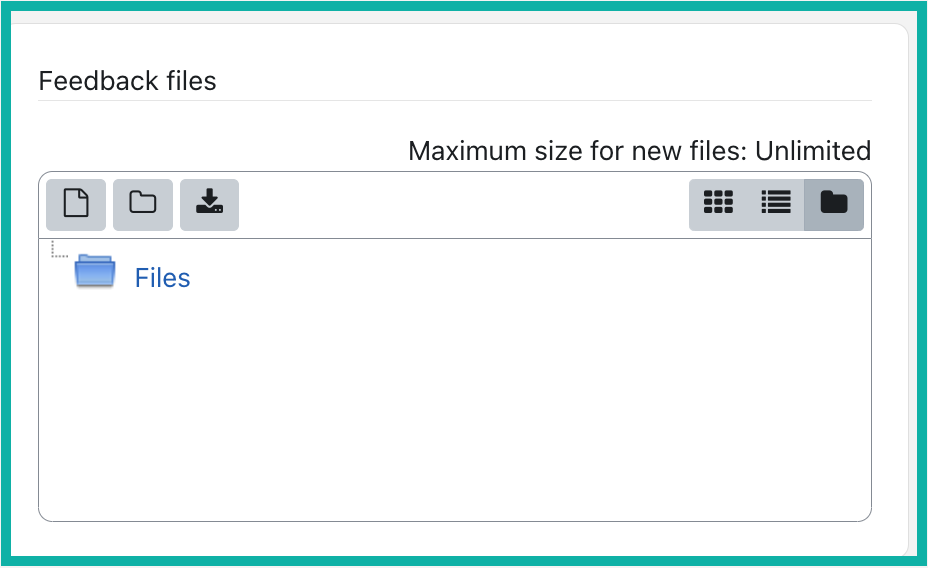
- Feedback files: You will be able to upload files with feedback when grading the assignments. These files may be, but are not limited to marked up student submissions, documents with comments or spoken audio feedback. Students will then able to download the feedback files you uploaded.
- Comment inline: In most cases, this is not preferred. If enabled, the text students submitted via the text editor will be copied into the feedback comment field/text editor during grading. Since you will most likely use the feedback text editor to provide feedback, it could be confusing for students.

Note: In some cases, student submitted files will not be properly converted a PDF copy. If it doesn't work with a student's submission, you will need to download the original file to view it.
